
 (Hex) Mayfly Dun from the Namekagon River in Wisconsin")
Hex Mayflies
Hexagenia limbata
The famous nocturnal Hex hatch of the Midwest (and a few other lucky locations) stirs to the surface mythically large brown trout that only touch streamers for the rest of the year.

Featured on the forum
 (Great Autumn Brown Sedge) Caddisfly Larva from the Yakima River in Washington")
This specimen appears to be of the same species as this one collected in the same spot two months earlier. The identification of both is tentative. This one suffered some physical damage before being photographed, too, so the colors aren't totally natural. I was mostly photographing it to test out some new camera setting idea, which worked really well for a couple of closeups.

Troutnut is a project started in 2003 by salmonid ecologist Jason "Troutnut" Neuswanger to help anglers and
fly tyers unabashedly embrace the entomological side of the sport. Learn more about Troutnut or
support the project for an enhanced experience here.

Entoman on Jan 24, 2012January 24th, 2012, 2:24 pm EST
And a great one, Al. Yogi & Booboo can be a problem. Nowaday's (at least in CA) they'd take away your gun and throw you in the hoosegow for what you did. Having said that, tackling a mature bear with birdshot was a gutsy thing. At very close range nothing is deadlier than a shotgun (I remember my dad impressing me with this fact by shooting an old fence post from 5 feet). The operative word is "close" though, and who wants to do that with a pissed off bear? I remember back in the day when the Outfitter I worked for did off-season duty as a guard for the pipeline construction. His weapon of choice was a German drilling. For those not familiar with the weapon, it's a break-action side-by-side 12 ga. over the top of an 8mm Mauser barrel. Boy, did he have some stories. Polar bears and Barren Ground grizzlies sure ain't Yogi. They weren't looking for "pic-a-nic type baskets"....:)
"It's not that I find fishing so important, it's just that I find all other endeavors of Man equally unimportant... And not nearly as much fun!" Robert Traver, Anatomy of a Fisherman
Greglindsey on Jan 3, 2014January 3rd, 2014, 3:39 pm EST
Ever skin a groundhog?
I have skinned one before right after I shot it and it wasn't that hard. I skinned it just like you skin a deer but smaller. After I skinned it I stretched it on a board and put borax on it. Let it sit a little while and you have yourself a nice woodchuck hide.

GldstrmSam on Jan 4, 2014January 4th, 2014, 6:03 am EST
I am going to have to try that borax idea. I usually use salt but since I grow or hunt most of my feathers and fur for tying I end up depleting the kitchen pretty fast.:)
It is great that you brought this thread to the top! There are some very amusing posts that I want to reread when I have time.:)
It is great that you brought this thread to the top! There are some very amusing posts that I want to reread when I have time.:)
There is no greater fan of fly fishing than the worm. ~Patrick F. McManus

Oldredbarn on Jan 4, 2014January 4th, 2014, 3:04 pm EST
Call Chris Helm and ask him about Dawn dishwashing soap. No one has had more experience with doing his own deer skins as Chris has.
http://whitetailflytieing.com
Spence
http://whitetailflytieing.com
Spence
"Even when my best efforts fail it's a satisfying challenge, and that, after all, is the essence of fly fishing." -Chauncy Lively
"Envy not the man who lives beside the river, but the man the river flows through." Joseph T Heywood
"Envy not the man who lives beside the river, but the man the river flows through." Joseph T Heywood
Entoman on Jan 5, 2014January 5th, 2014, 2:11 am EST
Spence & Sam -
Soap can cure the hide quickly and fairly easily, but the problem is it also cures the fur/feathers at the same time. Besides stripping all the natural oils with strong soap, the boiling water the method employs does bad things to the hair fibers/feather barbules, too. Curling hackle barbules and drying out material a few times this way savvied me up. IMO, dishwashing soap (Dawn is a good one) is best used for degreasing and cleaning hides/necks prior to throwing cured hunks of hide into a dye bath.
Dry methods are best because they cure the hide, but leave the stuff we care about alone. The method I use is simple, cheap, maintains optimal material quality and leaves you with fairly supple and even fully tanned hides if you want to do the extra steps - not garment quality but perfect for fly tying. If done properly, the hide won't ever get funky and the hair/feathers won't slip. I've got a few necks and strips of fur that are at least 30 years old and still going strong. I've done hundreds of critters this way over the years with excellent results. There are several ways to skin the cat ;), but here's what I do.
1. Begin with a pegged and fleshed hide hair/feather down. Cover with salt. Don't rub it in, just spread and firmly pat. You want to draw the excess fat and moisture out not impregnate it (that comes later). It should completely cover the hide deep enough so that the salt's surface is completely dry. You will need to sprinkle more on the wet spots after a few hours on the moist spots.
2. Brush off the salt after a day or two & re-flesh before the residual turns to jerky and becomes exponentially more difficult to remove. Reapply salt as before. I'll do this several times, the number depending on the critter.
3. At some point (when the hide is dried out) I'll rinse the salt off with a hose and brush and then rub borax into the wet hide. Be aggressive with the rubbing and liberal with the borax. When the hide has absorbed as much as you think it will, add and rub some more. The last step at this stage is to add a layer as was done with the salt. Again, add more later to the wet spots. As with the salt, you will have to brush off the old and reapply again. I've never had to do this more than once.
4. When it is fully dried, shake off the excess (don't brush it this time) and store the cured hide in a bug free zone. BTW, leave it pegged if you have room.
In leu of step 4, the hide can be brushed clean, trimmed, rubbed with a little neatsfoot oil and cut into squares for immediate use. The reason for step 4 is aging in storage for awhile further degrades the saccharides in the hide. This is so it can better absorb the oil or be brain tanned. Working strips of tanned hide over a rounded object with a shoe polishing motion leaves it beautifully supple (not fluffy soft). Supple is easier to work with most of the time. I don't like garment soft because it is harder to work with. Brain tanning fresh hides without drying in salt or borax first will produce better results with less steps but you have to get on it right away and is too labor intensive. If you live in cold country you can leave them in a safe place frozen until you have time I suppose, but I'd worry about mice or other critters getting to them first.
There's more to it than can be covered in a single post, so ask away if you are interested, Sam.
"It's not that I find fishing so important, it's just that I find all other endeavors of Man equally unimportant... And not nearly as much fun!" Robert Traver, Anatomy of a Fisherman
Greglindsey on Jan 6, 2014January 6th, 2014, 11:42 am EST
All the Borax does is dry out the skin and leaves the hairfeathers untouched. I find it lasts a while after it is completely dried out.

Crepuscular on Jan 7, 2014January 7th, 2014, 8:46 am EST
Nice Thread!
LowBudget on Jan 20, 2014January 20th, 2014, 6:57 am EST
I use a fair amount of woodchuck fur in my tying.
I catch more fish on my Route 206 fly than I do on wooly buggers!

I hosted a woodchuck fly swap a few years ago. Here's the web page for that swap.
http://edengelman.com/Chuck/swap.html
One very hot day in the spring I was retuning home from a quick run to the hardware store. In the middle of the road was a dead woodchuck that wasn't there just 10 minutes earlier. I didn't have plans for the rest of the day other than finishing up a small job with the nuts and bolts I purchased, so I thought I might as well scoop it up and flesh out the hide. I scraped it on a board on my picnic table in the shade of a maple tree. I stretched it on a piece of plywood and borax into the hide. That was about 8 years ago and I still have a few patches of it left that I use.
I really like using the guard hairs with their white tips and dark base.
The underfur makes nice dubbing for a nymph fly that I tie that I named Route 206B
The road was Route 206 and thus the fly was born. I tie it on a size 12 hook for bass and on a size 18 streamer hook for brook trout.
Ed
I catch more fish on my Route 206 fly than I do on wooly buggers!
I hosted a woodchuck fly swap a few years ago. Here's the web page for that swap.
http://edengelman.com/Chuck/swap.html
One very hot day in the spring I was retuning home from a quick run to the hardware store. In the middle of the road was a dead woodchuck that wasn't there just 10 minutes earlier. I didn't have plans for the rest of the day other than finishing up a small job with the nuts and bolts I purchased, so I thought I might as well scoop it up and flesh out the hide. I scraped it on a board on my picnic table in the shade of a maple tree. I stretched it on a piece of plywood and borax into the hide. That was about 8 years ago and I still have a few patches of it left that I use.
I really like using the guard hairs with their white tips and dark base.
The underfur makes nice dubbing for a nymph fly that I tie that I named Route 206B
The road was Route 206 and thus the fly was born. I tie it on a size 12 hook for bass and on a size 18 streamer hook for brook trout.
Ed
Ed
Low Budget Fly Tying and Fishing author of "Behind the Fly"
http://edengelman.com/BTF.html
Low Budget Fly Tying and Fishing author of "Behind the Fly"
http://edengelman.com/BTF.html
Quick Reply
Related Discussions
Topic
Replies
Last Reply
15
Jul 26, 2016
by TimCat
by TimCat


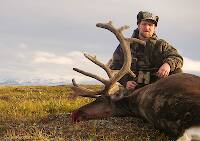
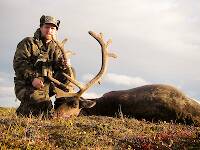
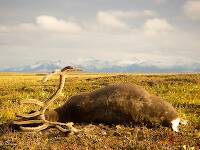
Re: My first caribou (and first bow kill of any kind) -- pictures 

In the Photography Board by Troutnut
+ 3
In the Photography Board by Troutnut
2
Aug 18, 2008
by Shawnny3
by Shawnny3
5
Sep 20, 2016
by Jmd123
by Jmd123