Hex Mayflies
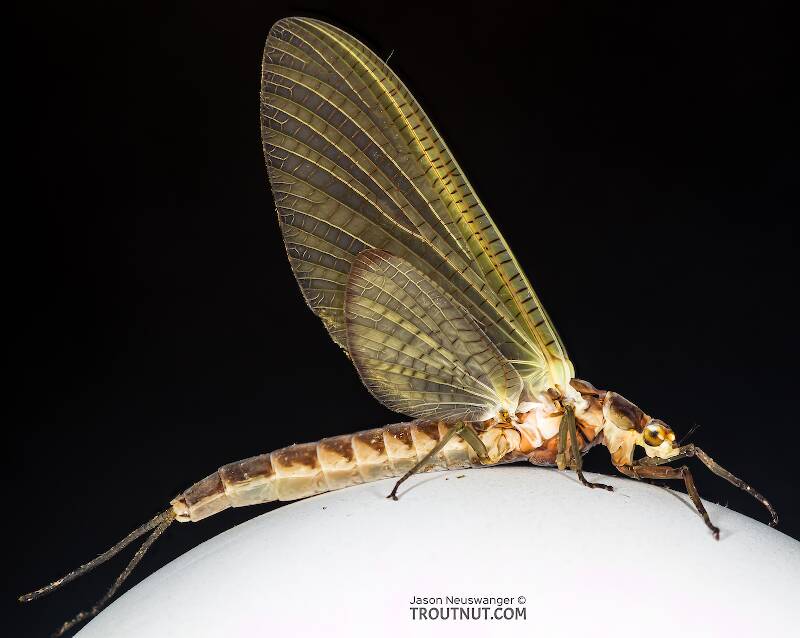
Hexagenia limbata
The famous nocturnal Hex hatch of the Midwest (and a few other lucky locations) stirs to the surface mythically large brown trout that only touch streamers for the rest of the year.
Featured on the forum
This seems to be a young larva of Limnephilus. Although not clear in the picture, several ventral abdominal segments have chloride epithelia.
Troutnut is a project started in 2003 by salmonid ecologist Jason "Troutnut" Neuswanger to help anglers and
fly tyers unabashedly embrace the entomological side of the sport. Learn more about Troutnut or
support the project for an enhanced experience here.
DOS on Apr 3, 2009April 3rd, 2009, 7:22 am EDT
g'afternoon guys,
Last night I was browsing through the forums and came across a link http://www.smallstreams.com/phpBB3/viewtopic.php?f=20&t=2237 to Roy Christie's Reverse Para style fly in the "Long time reader, first time poster" thread and it inspired a little tinkering at the vice. Having gone to bed with his creations on my mind, I awoke this morning with a severe itch to experiment in the medium of feather, fiber and fur to see how badly I could butcher Roy’s technique. :) Thought I’d share what I’ve been thinking with you.
According to Roy, from the link posted above, he developed his style of flies for a tiny, technical stream; suffering from drought educed, diminishing flows and subsequently uncooperative, skiddish fish. Through hundreds of hours of fishing and experimenting, Roy discovered that when he sunk the first few inches of tippit, hesitant fish seemed more easily coaxed to hand. Working with what he had at the time; Roy applied saliva, mud, fish slime and several other sinking agents to his line, but ultimately concluded that his traditional dry fliers were ill suited to the technique he wanted to employ. (I hope I have this synopses correct. I know Roy is a member of the site, perhaps he can elaborate)
Roy created a parachute style fly, tied backwards on a shrimp hook; allowing the eye to naturally submerge, theoretically bringing with it the first few inches of tippit. I don't want to post the pictures of this fly without permission, but you can see it here.
http://www.smallstreams.com/phpBB3/viewtopic.php?f=20&t=2237
I can relate to Roy's experience. I fish a spring creek in NY where it seems every summer water levels get lower and lower. A nearby, growing community has put lots of stress on the underground aquifer feeding the stream and the problem has been compounded by several summers of below average precipitation; hindering water table regeneration. Historically, this stream has had a noteworthy E. invaria emergence; however scary low water conditions and skittish fish, have made matching a notoriously tricky hatch, much more difficult.
Soooo, I'd like to work with Roy's ideas to add to my E. invaria (Sulphur) pattern arsenal.
E. invaria, true to its name, rises from the water in variable colors; dependent on water pH and other factors that change from stream to stream. I don’t have a photo of one of these critters from my creek, but as near as I can remember many of the duns resembled these in Jason’s photo.
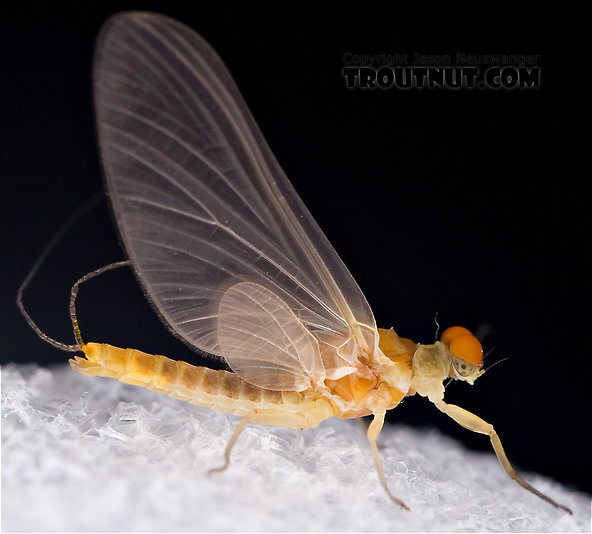
To suit my taste, I diverged from Roy's pattern to fit the style of dry fly I prefer, which are goose biot bodies, crowned with “Wally Wings” and wrapped in sparse hackle.
Here is what I have initially come up with. In a creative attempt to mimic the beautiful, upturned abdomen of the mayfly, I bent the front third of the hook shank up at a slight angle. This might thwart Roy’s submerged hook eye/tippit hypothesis, however I compensated by tying the hackle on a forward diagonal, hopefully allowing the hook eye to suspend below the water’s meniscus. The angles of the photos don’t do this justice. In addition to the diagonally warped hackle, I intend to fish this fly only with fluorocarbon tipit material, which is much denser then monofilament and readily sinks. To my eye, it’s a pleasing fly, I’m not sure how it will respond in the water, but I hope to develop it further as I get feedback from the trout this May.


Recipie:
Hook – 1182 Diiachi Dry Fly #14-16
Thread- 0/8 Uni Cotton Brown
Rib- 6x monofilament
Body- light tan goose biot colored yellow with indelible pen
Thorax- downy barbs from yellow mallard flank, dubbed (finger twisted)
Wing- yellow mallard flank tied “Wally Wing” style (pealed)
Hackle- oversized Whiting Farms “genetic line” light ginger barred dry fly hackle, wrapped sparse
Tail- “Mayfly Tails” treated with water shed, (6-8)
This was my first time photographing against a black background so excuse the slightly blowout colors, I’m still trying to perfect the technique. Fly is shown in #14.
1
2
3 When clipping the excess mallard flank, trim it so the snipped butts fall just beyond the upward bend on the hook shank. Bind down the fibers with nice flat thread wraps. This will create a pleasing taper in the thickness of the fly, imitating the natural nicely.
4
5
6
7
8 Photos 8-10 show a three step technique for tying in biots and hackle that I have recently forced myself to get into the habit of doing. It seems to significantly increased the durability of these delicate materials at the tie in point.
9
10
11
12
13
14
15 Photos 15-17 again demonstrate the three step tie in technique for delicate materials such as hackle and biots. Strip the fibers from the quill and attach the hackle horizontal to the hook shank with two firm wraps. Do not trim the exposed quill.
16 Fold the quill back over itself, securing it with a single firm wrap.
17 Now finish securing the hackle quill with two wraps, binding it directly to the exposed hook shank.
18 Before you start warping the hackle, complete three or four tight wraps of thread in a clockwise direction around the base of mallard flank wing and hackle.
19 Now wrap the hackle in a counter clockwise direction, opposite the thread wraps you just completed. This will add stability and rigidity to your "Wally Wings". I like to dress my flies sparse, two or three wraps is usually just right.
20 After wrapping and securing the hackle, trim excess and pull the "wally wing" and hackle barbs forward at a 45 degree angle while placing several figure eight wraps to secure it in place.
21 Strip the downy barbs from a mallard flank to twist dub the abdomen.
22
23
24
25
26
27
28 The fly is almost complete. Its time to free our wally wings. Separate several mallard flank fibers away from the main stem as we did in step. Use a needle to unzip the barbs if necessary.
29 Use your hackle pliers to pull up on the main stem of the mallard flank while gently pulling down on the fibers you just separated. Free each side of the wing one at a time.


Last night I was browsing through the forums and came across a link http://www.smallstreams.com/phpBB3/viewtopic.php?f=20&t=2237 to Roy Christie's Reverse Para style fly in the "Long time reader, first time poster" thread and it inspired a little tinkering at the vice. Having gone to bed with his creations on my mind, I awoke this morning with a severe itch to experiment in the medium of feather, fiber and fur to see how badly I could butcher Roy’s technique. :) Thought I’d share what I’ve been thinking with you.
According to Roy, from the link posted above, he developed his style of flies for a tiny, technical stream; suffering from drought educed, diminishing flows and subsequently uncooperative, skiddish fish. Through hundreds of hours of fishing and experimenting, Roy discovered that when he sunk the first few inches of tippit, hesitant fish seemed more easily coaxed to hand. Working with what he had at the time; Roy applied saliva, mud, fish slime and several other sinking agents to his line, but ultimately concluded that his traditional dry fliers were ill suited to the technique he wanted to employ. (I hope I have this synopses correct. I know Roy is a member of the site, perhaps he can elaborate)
Roy created a parachute style fly, tied backwards on a shrimp hook; allowing the eye to naturally submerge, theoretically bringing with it the first few inches of tippit. I don't want to post the pictures of this fly without permission, but you can see it here.
http://www.smallstreams.com/phpBB3/viewtopic.php?f=20&t=2237
I can relate to Roy's experience. I fish a spring creek in NY where it seems every summer water levels get lower and lower. A nearby, growing community has put lots of stress on the underground aquifer feeding the stream and the problem has been compounded by several summers of below average precipitation; hindering water table regeneration. Historically, this stream has had a noteworthy E. invaria emergence; however scary low water conditions and skittish fish, have made matching a notoriously tricky hatch, much more difficult.
Soooo, I'd like to work with Roy's ideas to add to my E. invaria (Sulphur) pattern arsenal.
E. invaria, true to its name, rises from the water in variable colors; dependent on water pH and other factors that change from stream to stream. I don’t have a photo of one of these critters from my creek, but as near as I can remember many of the duns resembled these in Jason’s photo.

To suit my taste, I diverged from Roy's pattern to fit the style of dry fly I prefer, which are goose biot bodies, crowned with “Wally Wings” and wrapped in sparse hackle.
Here is what I have initially come up with. In a creative attempt to mimic the beautiful, upturned abdomen of the mayfly, I bent the front third of the hook shank up at a slight angle. This might thwart Roy’s submerged hook eye/tippit hypothesis, however I compensated by tying the hackle on a forward diagonal, hopefully allowing the hook eye to suspend below the water’s meniscus. The angles of the photos don’t do this justice. In addition to the diagonally warped hackle, I intend to fish this fly only with fluorocarbon tipit material, which is much denser then monofilament and readily sinks. To my eye, it’s a pleasing fly, I’m not sure how it will respond in the water, but I hope to develop it further as I get feedback from the trout this May.


Recipie:
Hook – 1182 Diiachi Dry Fly #14-16
Thread- 0/8 Uni Cotton Brown
Rib- 6x monofilament
Body- light tan goose biot colored yellow with indelible pen
Thorax- downy barbs from yellow mallard flank, dubbed (finger twisted)
Wing- yellow mallard flank tied “Wally Wing” style (pealed)
Hackle- oversized Whiting Farms “genetic line” light ginger barred dry fly hackle, wrapped sparse
Tail- “Mayfly Tails” treated with water shed, (6-8)
This was my first time photographing against a black background so excuse the slightly blowout colors, I’m still trying to perfect the technique. Fly is shown in #14.
1

2

3 When clipping the excess mallard flank, trim it so the snipped butts fall just beyond the upward bend on the hook shank. Bind down the fibers with nice flat thread wraps. This will create a pleasing taper in the thickness of the fly, imitating the natural nicely.

4

5

6

7

8 Photos 8-10 show a three step technique for tying in biots and hackle that I have recently forced myself to get into the habit of doing. It seems to significantly increased the durability of these delicate materials at the tie in point.

9

10

11

12

13

14

15 Photos 15-17 again demonstrate the three step tie in technique for delicate materials such as hackle and biots. Strip the fibers from the quill and attach the hackle horizontal to the hook shank with two firm wraps. Do not trim the exposed quill.

16 Fold the quill back over itself, securing it with a single firm wrap.

17 Now finish securing the hackle quill with two wraps, binding it directly to the exposed hook shank.

18 Before you start warping the hackle, complete three or four tight wraps of thread in a clockwise direction around the base of mallard flank wing and hackle.

19 Now wrap the hackle in a counter clockwise direction, opposite the thread wraps you just completed. This will add stability and rigidity to your "Wally Wings". I like to dress my flies sparse, two or three wraps is usually just right.

20 After wrapping and securing the hackle, trim excess and pull the "wally wing" and hackle barbs forward at a 45 degree angle while placing several figure eight wraps to secure it in place.

21 Strip the downy barbs from a mallard flank to twist dub the abdomen.

22

23

24

25

26

27

28 The fly is almost complete. Its time to free our wally wings. Separate several mallard flank fibers away from the main stem as we did in step. Use a needle to unzip the barbs if necessary.

29 Use your hackle pliers to pull up on the main stem of the mallard flank while gently pulling down on the fibers you just separated. Free each side of the wing one at a time.


Andrew Nisbet
Martinlf on Apr 3, 2009April 3rd, 2009, 8:42 am EDT
Cool, Andrew. I've seen this pattern before, and vowed to try it, but got busy with other things and forgot. Thanks for posting this up. I didn't see your photos, though. Perhaps my browser's on the fritz.
"He spread them a yard and a half. 'And every one that got away is this big.'"
--Fred Chappell
--Fred Chappell
DOS on Apr 3, 2009April 3rd, 2009, 11:03 am EDT
HA! It's not your browser Martinlf. I don't see the pics either. I swear they were here when I checked after posting. :) I think this will be the last time I use Google images to host my photos. It has been happening a lot to me lately. I'll upload them to photobucket and give that a try.
Andrew Nisbet
Shawnny3 on Apr 3, 2009April 3rd, 2009, 12:05 pm EDT
Beautiful fly, Andrew. An elegant tie in both technique and appearance. Well conceived and well executed.
-Shawn
-Shawn
Jewelry-Quality Artistic Salmon Flies, by Shawn Davis
www.davisflydesigns.com
www.davisflydesigns.com
DOS on Apr 3, 2009April 3rd, 2009, 12:10 pm EDT
Thanks Shawn! Here's to the fish feeling the same way!! I've drooled over your precise pieces of art for quite some time!
Andrew Nisbet
REE on Apr 3, 2009April 3rd, 2009, 12:22 pm EDT
Very nice take on Roy's Reverse Para. I'm sure he's really like to see where you've taken it. Do you mind if I e-mail him the link. He's sure to like what you've done.
REE
REE
Happiness is wading boots that never have a chance to dry out.
DOS on Apr 3, 2009April 3rd, 2009, 12:31 pm EDT
Sure thing REE. I'd love to hear more about how and why he developed his fly!
Andrew Nisbet
JAD on Apr 3, 2009April 3rd, 2009, 12:52 pm EDT
I think you did a wonderful job on the tie. When I checked earlier the post was all screw up, I think you will like photo bucket.
Welcome to the board REE .
JAD
Welcome to the board REE .
JAD
They fasten red (crimson red) wool around a hook, and fix onto the wool two feathers which grow under a cock’s wattles, and which in colour are like wax.
Radcliffe's Fishing from the Earliest Times,
REE on Apr 3, 2009April 3rd, 2009, 2:29 pm EDT
Andrew,
I'll e-mail the link to him and also let him know by PM.
JAD, thenks for the welcome. I keep running into people I know around the cyber world.
REE
I'll e-mail the link to him and also let him know by PM.
JAD, thenks for the welcome. I keep running into people I know around the cyber world.
REE
Happiness is wading boots that never have a chance to dry out.
Shawnny3 on Apr 3, 2009April 3rd, 2009, 2:40 pm EDT
Thank you, Andrew. I had the pleasure of watching Roy tie one of his dries (can't remember if it was exactly in this style), and it's something to witness. The elegance of the final product belies the speed with which he ties - he simply flies through the steps without pause. Hopefully he'll weigh in with his thoughts on your fly.
-Shawn
-Shawn
Jewelry-Quality Artistic Salmon Flies, by Shawn Davis
www.davisflydesigns.com
www.davisflydesigns.com
Martinlf on Apr 3, 2009April 3rd, 2009, 3:01 pm EDT
Great tie. Thanks for providing the photos.
"He spread them a yard and a half. 'And every one that got away is this big.'"
--Fred Chappell
--Fred Chappell
RoyChristie on Apr 3, 2009April 3rd, 2009, 10:39 pm EDT
Good work, Andrew, that should prove interesting, your trout will be the judge.
I would fish it for sure.
If you do have any problem getting the tippet to sink, make the tails a wee bit shorter. I reckon it will be fine as it is.
I'd worry about the durability of the Wally Wings if I were prone to worry, but as I'm not, the fly will fish equally well after they get totally mashed, I am sure.
I look forward to seeing your results, give my love to a NY creek
As to the story of its development, it's as suggested above with thirty years of development, lots of dead ends and silly stuff - but resulting in a pretty effective design
Thanks for the kind words, folks, thanks for the heads-up Ron.
bye for now,
Roy
Softhackle on Apr 4, 2009April 4th, 2009, 3:08 am EDT
I've seen Roy tie a number of times, and I greatly admire his unique style, especially his backwards, upside-down flies. Roy also ties some great soft-hackles, too.
Andrew,
Your fly looks superb and I suspect that it will do very well on where you fish. I've not fished up you way, but I do a lot of fishing on the Upper Genesee, which is south of you. Good luck in the upcoming season.
Mark
Andrew,
Your fly looks superb and I suspect that it will do very well on where you fish. I've not fished up you way, but I do a lot of fishing on the Upper Genesee, which is south of you. Good luck in the upcoming season.
Mark
"I have the highest respect for the skilled wet-fly fisherman, as he has mastered an art of very great difficulty." Edward R. Hewitt
Flymphs, Soft-hackles and Spiders: http://www.troutnut.com/libstudio/FS&S/index.html
Flymphs, Soft-hackles and Spiders: http://www.troutnut.com/libstudio/FS&S/index.html
DOS on Apr 4, 2009April 4th, 2009, 3:33 pm EDT
Hi Roy,
Thanks for the inspiration and input! I'll certainly share my experiences as I fish this fly to hungry trout later this spring.
Besides the wally wings questionable durability, they are a bit of a hindrance to tie if time is an issue, so I tied up a version using a post of yellow mallard flank and substituted SLF dubbin for the biot. I can whip these up in no time at all and I think they'll fish just fine.
Also, I see where their tails could be a problem sinking the hook eye so I'll play around with different lengths and materials. Thanks for the heads up on that. Its the difference between your years of experience fishing this style of fly and my day dreaming at the vise. :) Thanks again.
Here is one in #16


Andrew Nisbet
Quick Reply
Related Discussions
Topic
Replies
Last Reply
1
Jan 7, 2009
by Phishheaduj
by Phishheaduj


